

Publish a Blog Post with an Author
A blog post names the people who wrote it. Authors are profiles you keep once and assign to any post; these steps go from the profile to a published post that carries it.
Before You Start
Section titled “Before You Start”- You are signed in with the Editor role or a higher one (Manager, Administrator). An Editor writes and publishes content. Sign In and Find Your Way Around covers signing in.
- The Pages panel is enabled.
- At least one author exists. The demo data has five.
-
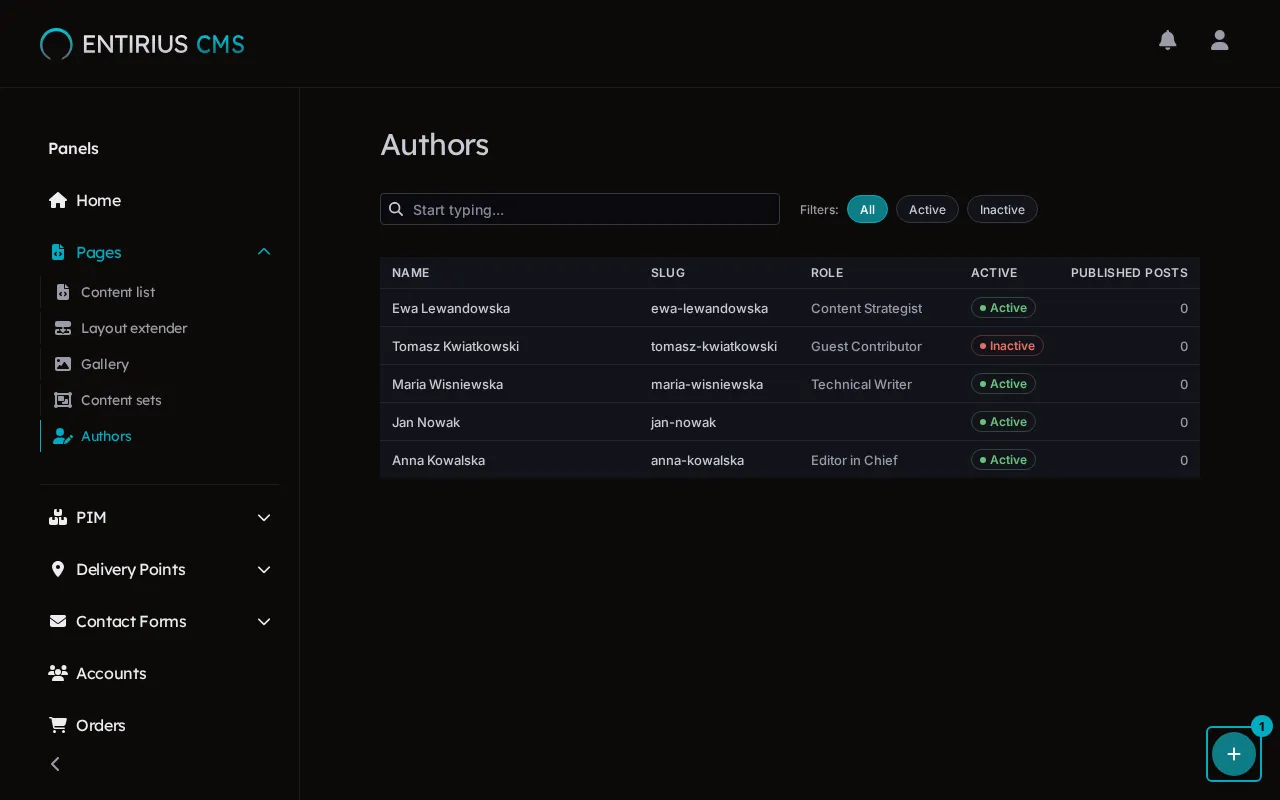
In the sidebar, open Pages and select Authors. The list holds the author profiles, each with its role and whether it is active. The add button (1) in the bottom right corner leads to Create author.
-
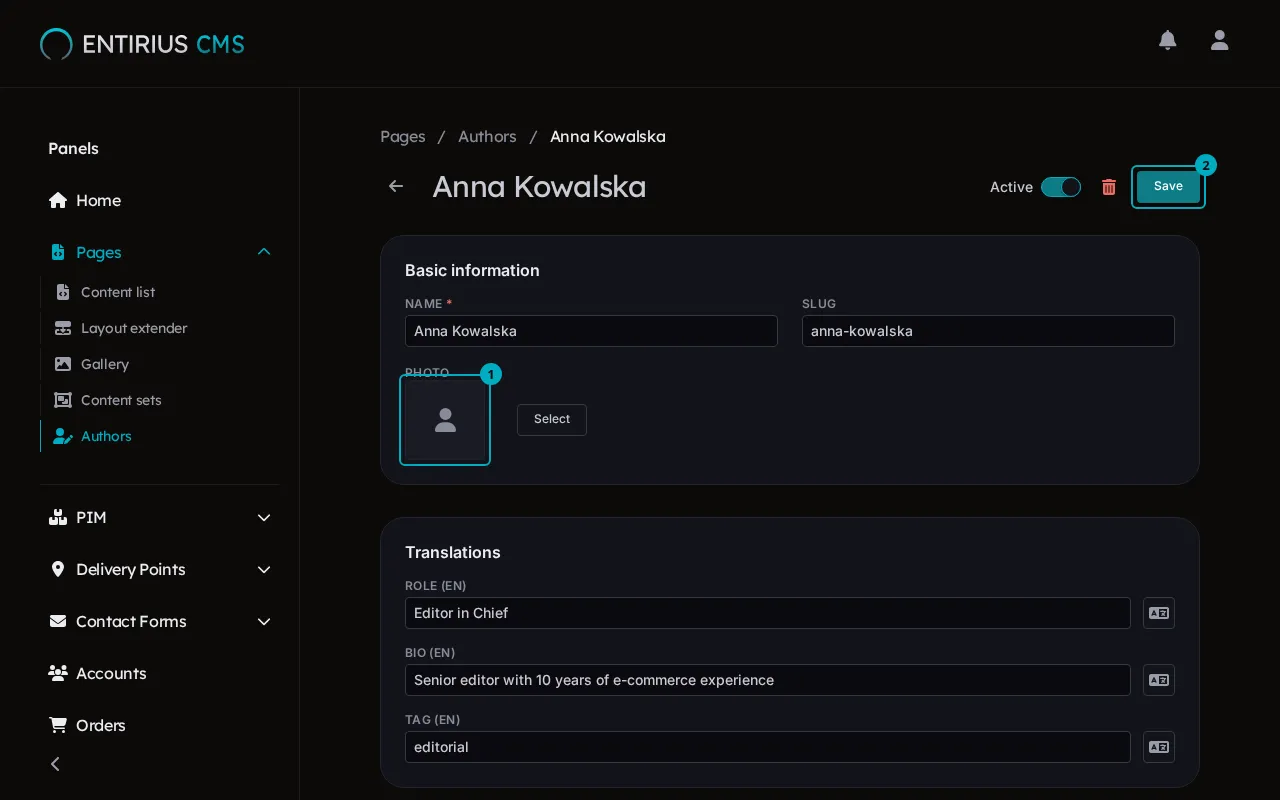
Select an author to open the profile. Name and Photo sit in Basic information, where (1) marks the photo; Role sits under Translations, one value per language (the label carries the language, here EN). Save (2) stores the profile. Switching Active off keeps the profile and takes it out of the picker of step 4. Deleting an author asks what happens to the posts: Reassign posts to another author, or Remove from all posts.
-
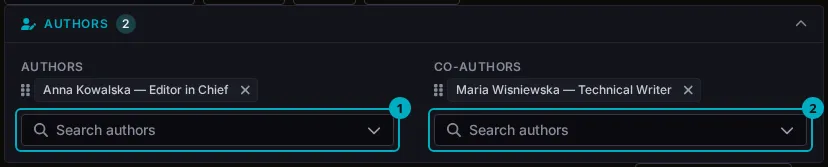
Open Content list, select Blog post in the filter row, and open a post. Select the Advanced icon button, then the Authors bar that appears under it. The bar opens two fields: Authors (1) and Co-authors (2).
-
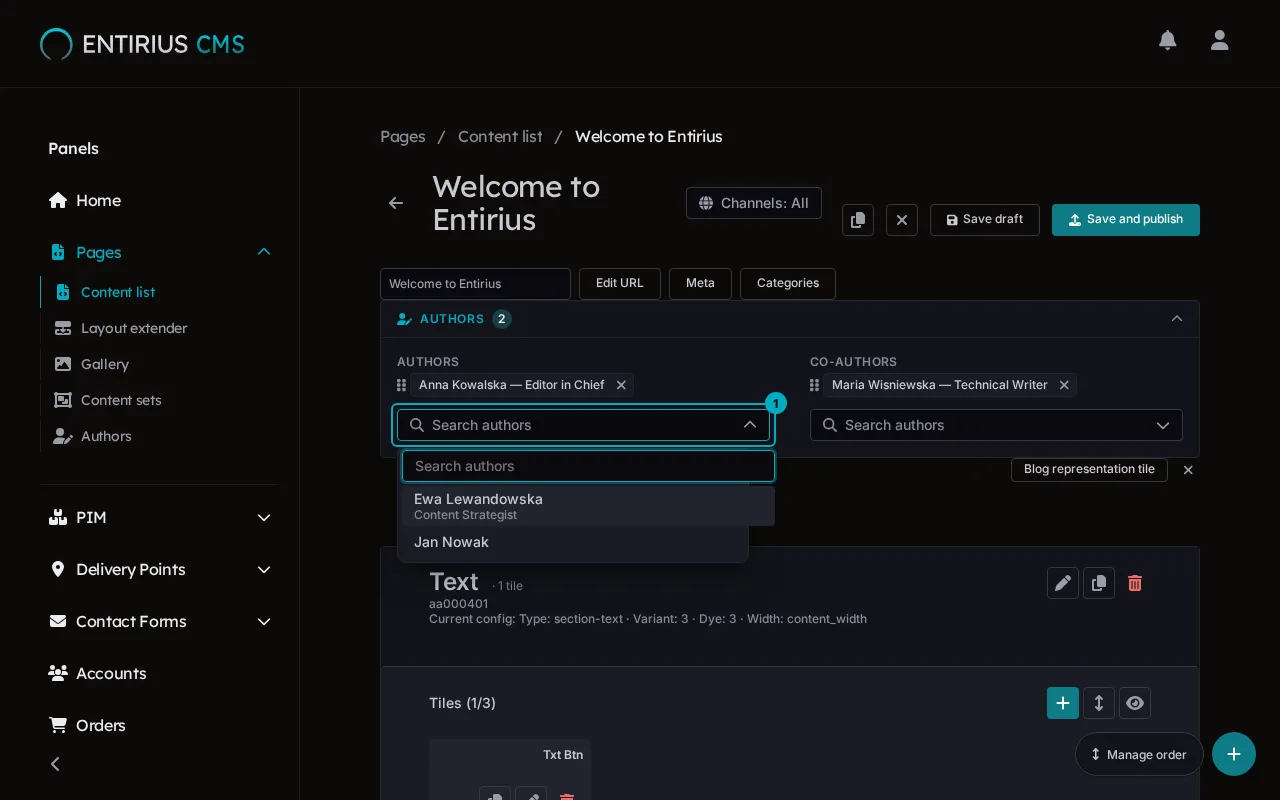
Select a field (1) and type in Search authors, then pick a name. The picker offers active authors, and one person cannot be both author and co-author of the same post. Each assigned author shows as a tag: drag the tags to change the order.
-
Save draft (1) stores the post without publishing it; Save and publish (2) puts it live. A blog post also carries a Blog representation tile, the tile shown on the blog listing; its button sits under the author fields.

Result
Section titled “Result”The post lists its authors and co-authors in the order you set. Once published, each author’s name, role and photo travel with the post, so a storefront can show them without a second request. The model and the API behind it: ContentDB module docs.