

Manage Categories
Categories form one tree per channel, and the storefront builds its catalog menu from it. These steps read the tree, create a category under an existing one, and show where its details and products live.
Before You Start
Section titled “Before You Start”- You are signed in with the Editor role or a higher one (Manager, Administrator). Sign In and Find Your Way Around covers signing in.
- The PIM panel is enabled.
- A parent category exists. The demo data has Chairs.
-
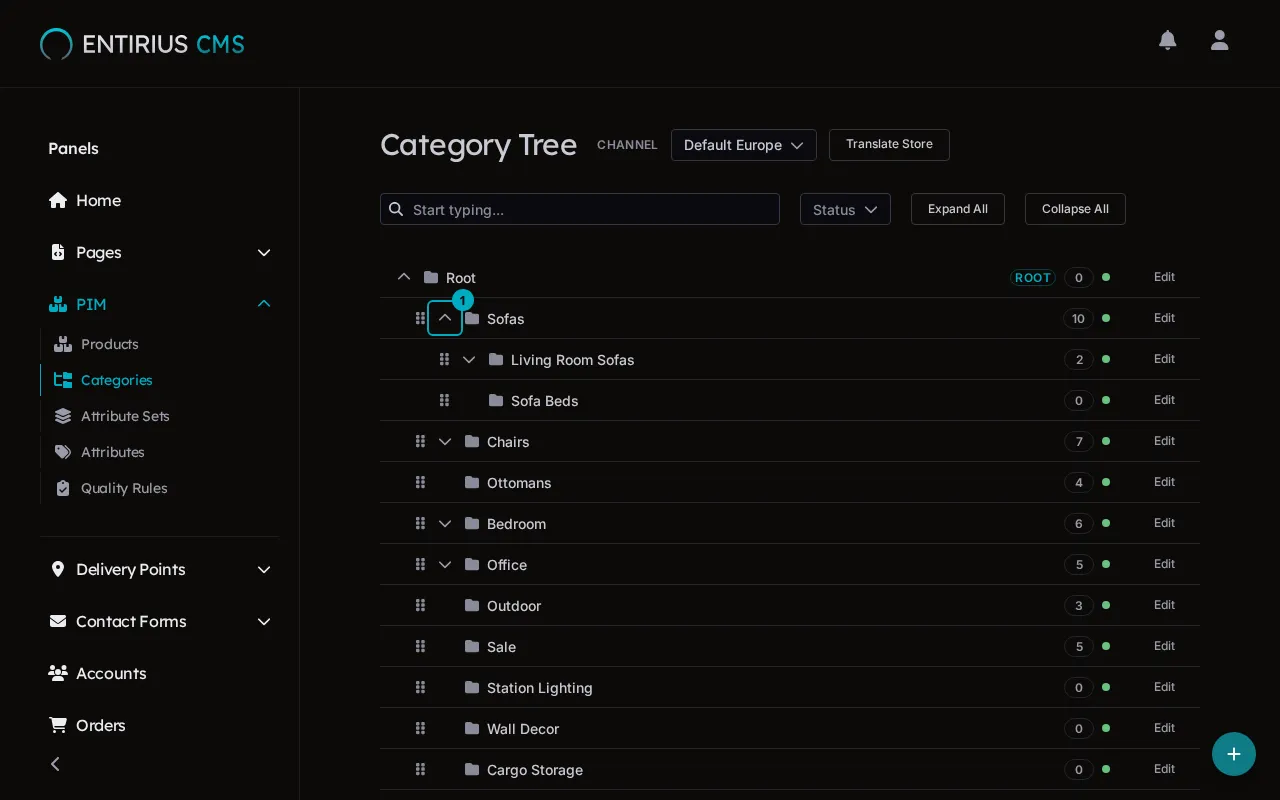
In the sidebar, open PIM and select Categories. The Category Tree shows one row per category. The toggle (1) opens and closes a branch; Expand All and Collapse All do it for the whole tree. Edit at the end of a row opens the category.
-
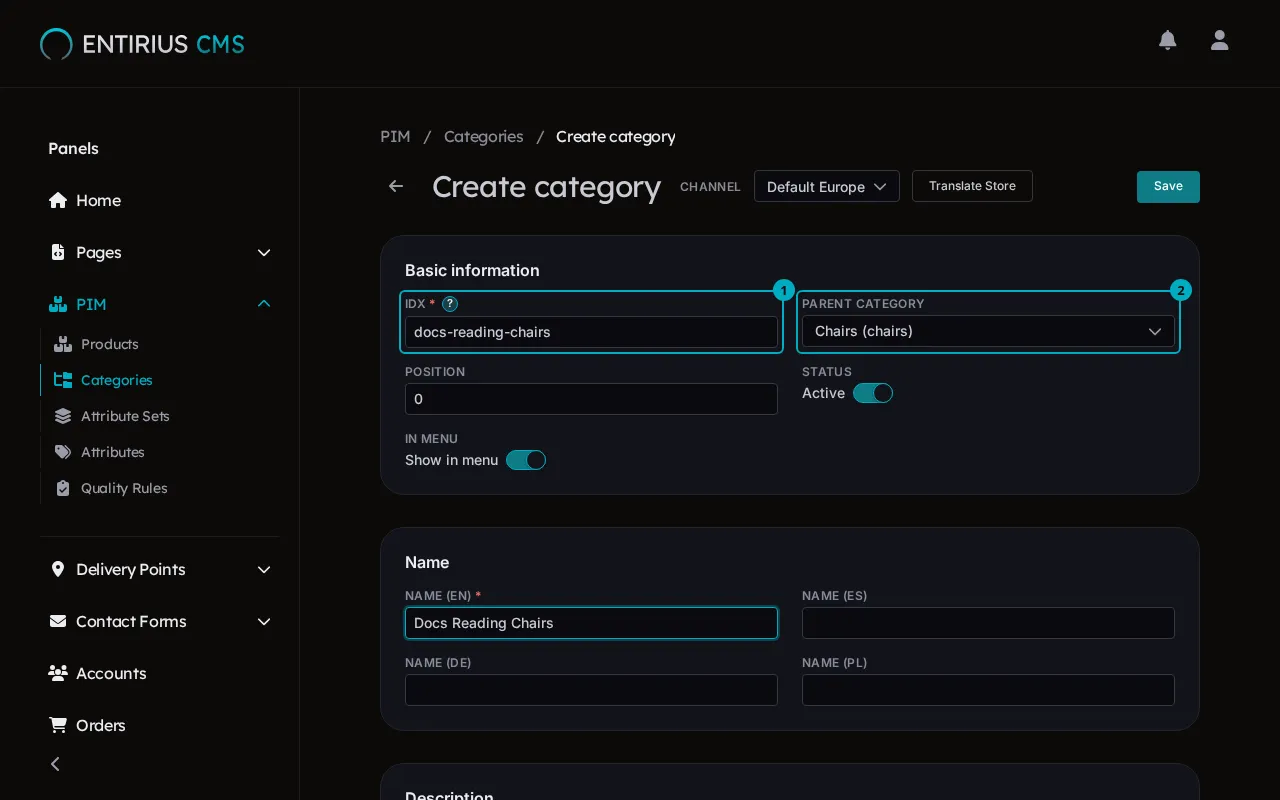
Select the add button in the bottom right corner, then Add Root Category. Type the IDX (1): it is the category’s permanent identifier and is fixed after the first save. Choose the Parent category (2) and type the Name. Active and Show in menu come switched on.
-
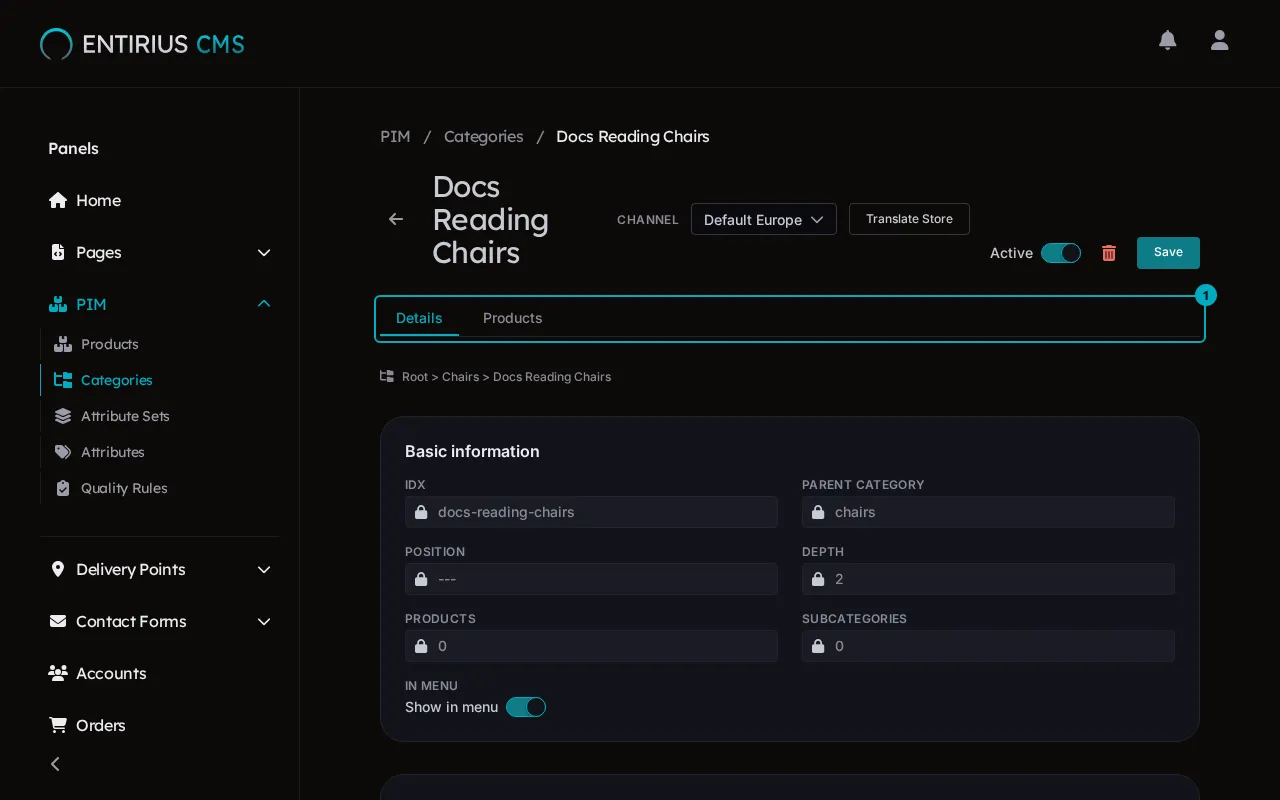
Select Save. The category opens on its own page with two tabs (1): Details holds the fields you just filled, Products lists the products of the category. The path under the tabs shows where the category sits in the tree.
-
Go back to Categories and open the parent’s branch. The new category is in it.

Result
Section titled “Result”The category is part of the tree under the parent you chose. It is active and offered to the menu until you switch Active or Show in menu off on its page.