

Upload Media
The gallery holds the images that content pages and blog posts use. These steps upload a photo with alt text and show where it lands.
Before You Start
Section titled “Before You Start”- You are signed in with the Editor role or a higher one (Manager, Administrator). Sign In and Find Your Way Around covers signing in.
- The Pages panel is enabled.
- The image file is on your computer.
-
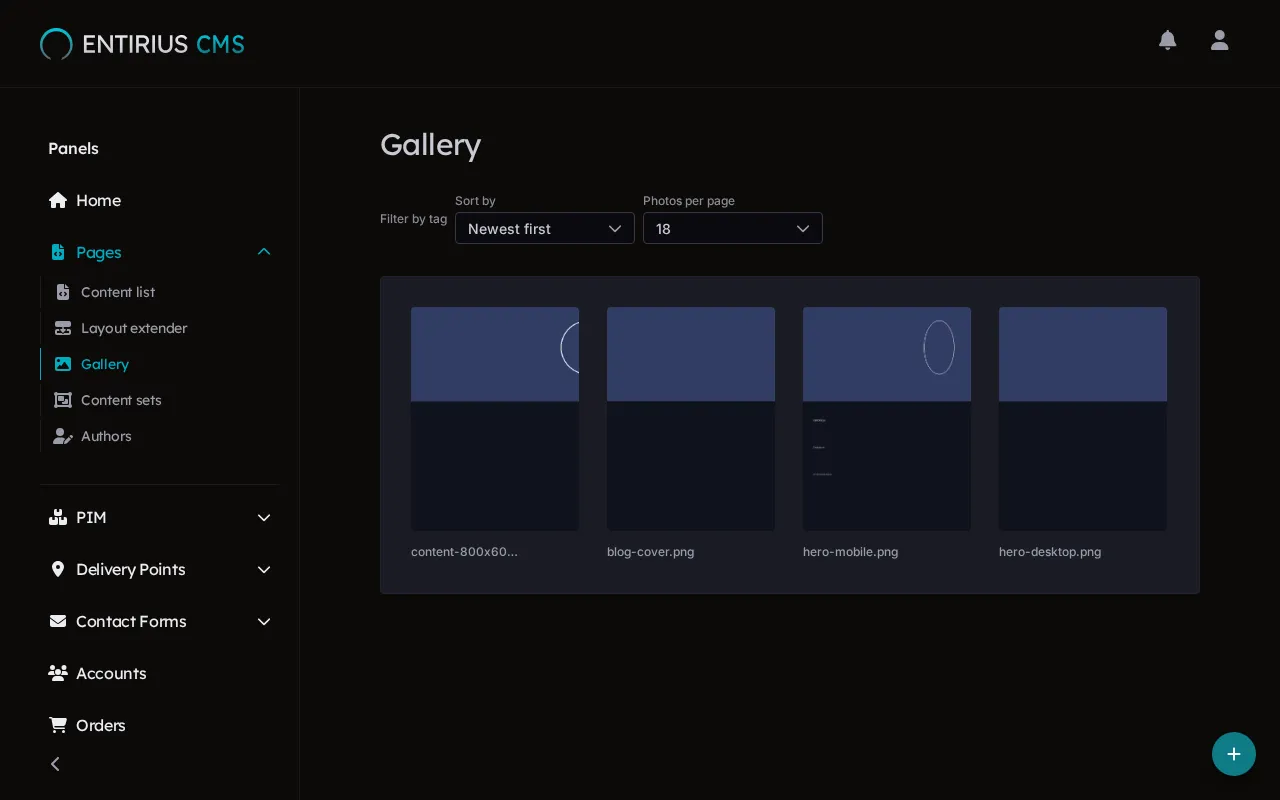
In the sidebar, open Pages and select Gallery. The tiles come sorted Newest first; Sort by and Photos per page change the view. The add button sits in the bottom right corner.
-
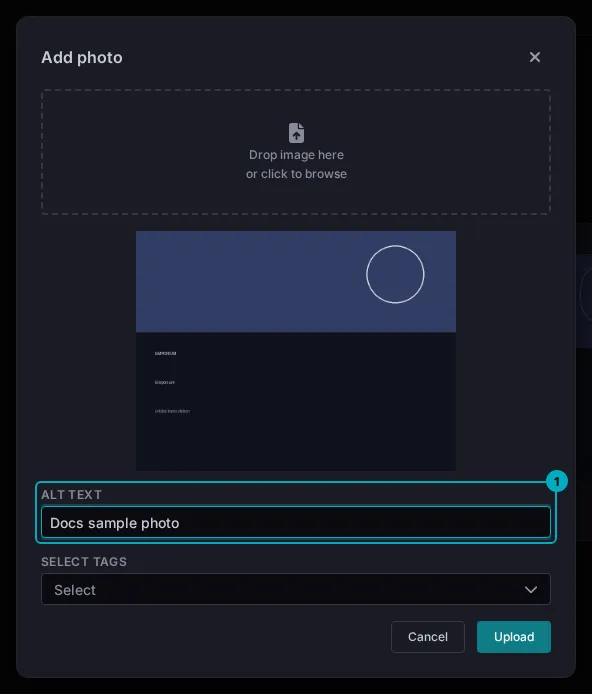
Select the add button, then Add photo. Drop the file on Drop image here, or click the area to pick it from your computer. Type the Alt text (1): the description a screen reader reads out in place of the image. Select Upload.
-
The new photo is the first tile. Hover over a tile to reach Delete photo; the CMS asks you to confirm before it removes the image.

Result
Section titled “Result”The photo is in the gallery and can be picked wherever a page or a post takes an image.